Executive Summary
Local stone repair and restoration services restore natural and engineered stone in-place by combining stone-safe cleaning, controlled abrasion (honing/polishing), targeted repairs, and breathable protection matched to the stone type, finish, and site exposure. In California, durable results depend on region-specific planning for salt air, hard water, UV, and movement—plus a documented test area and a defined grit progression to prevent swirl marks and finish mismatch.
- Scope Clarity: On-site restoration typically covers deep cleaning, surface correction, repairs, and sealing, but not major drainage, structural engineering, or full waterproofing rebuilds without demolition.
- Correct Method Selection: Etches, scratches, lippage, and recurring haze require the right abrasive sequence and repair-first workflow—not stronger cleaners or quick “shine” coatings that can fail or trap moisture.
- California Condition Fit: Coastal salts, hard-water minerals, UV exposure, and seismic/soil movement change joint strategy and sealer choice, so vet providers on test sections, dust/slurry control, product compatibility, and licensing awareness at the $500 threshold.
Local stone repair and restoration services are on-site trades that clean, repair, refinish, and protect natural and engineered stone surfaces to restore safety, function, and appearance. In California, technicians commonly correct etched marble vanity tops in Los Angeles homes caused by acidic cleaners, then re-hone to remove dull rings and re-polish to match the original sheen. In the Bay Area, crews often reset loose travertine patio pavers after soil movement, rebuild the compacted base, re-level joints, and apply a breathable penetrating sealer suited for foggy coastal moisture. In San Diego, salt-air exposure frequently drives spalling and joint failure on limestone pool coping, so restoration may include selective stone replacement, color-matched patching, and flexible exterior-grade jointing to reduce future cracking. In Sacramento and the Central Valley, hard-water deposits can haze granite and quartzite around sinks, so pros may use controlled poultices, mechanical polishing, and stain-guard sealing to reduce mineral re-bonding. A proper assessment typically measures scratch depth, checks lippage with a straightedge, identifies stone type and finish, and selects abrasives by grit progression to avoid swirl marks and over-polishing.
What “On‑Site Stone Restoration” Covers (and What It Doesn’t)
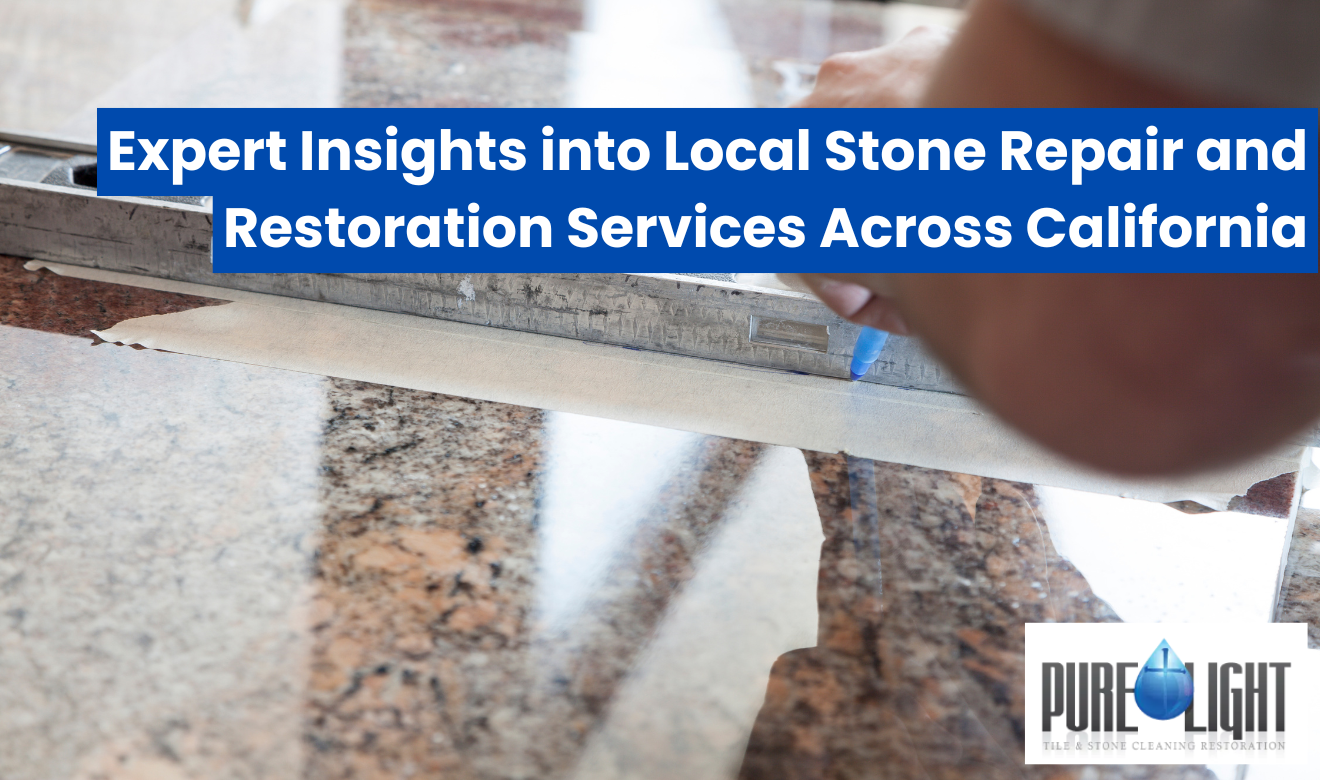
Local stone repair and restoration services focus on correcting damage in-place—without full demolition—by cleaning, flattening, refinishing, and protecting the existing surface. The scope is defined by the stone type, the finish (honed, polished, brushed, flamed), and whether the problem is cosmetic, structural, or moisture-driven.
Most field work falls into four categories:
- Deep cleaning: removal of embedded soil, oils, efflorescence, soap scum, algae, and hard-water deposits using stone-safe chemistry and controlled agitation.
- Surface correction: grinding, honing, polishing, and buffing to remove etches, scratches, dull lanes, and uneven sheen.
- Repairs: chip/crack filling, seam and joint stabilization, resetting loose tiles/pavers, and replacing failed grout or flexible joints.
- Protection: breathable impregnating sealers, stain guards, and maintenance guidance appropriate to the stone’s porosity and location.
What it typically does not include:
- Foundation or drainage reconstruction beyond the immediate stone/paver base needed for reset (that may require a landscape or drainage contractor).
- Full waterproofing rebuilds behind tile unless the assembly is opened (showers with substrate failure may require a licensed tile contractor).
- Structural engineering repairs to slabs, retaining walls, or framing.
California-Specific Factors That Change the Restoration Plan
California job sites frequently require different abrasives, sealers, and joint strategies due to coastal salts, seismic movement, and water chemistry. A technician’s workflow should be tailored to region and exposure rather than using a one-size method.
Common California drivers and technical responses:
- Coastal salt air (San Diego, Orange County, Bay shoreline): accelerates metal corrosion, joint breakdown, and surface scaling on some limestones; restoration often includes salt-residue removal, selective replacement, and exterior-rated elastomeric sealant at change-of-plane joints.
- Hard water (many municipal supplies and well areas): causes mineral haze at sinks and shower lines; removal often requires non-acid descaling alternatives for calcite stones (marble/limestone/travertine).
- Seismic and soil movement: contributes to lippage, cracked grout lines, and loose pavers; repairs frequently include reset work and flexible movement joints rather than rigid patching alone.
- High UV (inland valleys/desert edges): can degrade topical coatings; breathable penetrating sealers are typically preferred on exterior stone.
Legal/standards reality for hiring:
- In California, construction work that totals $500 or more (labor + materials) generally requires an appropriately licensed contractor under the Contractors State License Law (California Business and Professions Code section 7028 addresses penalties for unlicensed contracting). Many restoration firms operate under a C-54 (Tile) or related license when work crosses into installation/reset, waterproofing, or significant repair.
- For employee safety and jobsite controls, reputable operators follow Cal/OSHA requirements (e.g., silica exposure controls when grinding stone, respirators/HEPA vacuums where needed).
Assessment Checklist Pros Use Before Touching the Stone
A proper assessment determines the least aggressive method that achieves the target finish while protecting edges, grout, and adjacent materials. The goal is repeatable results: flatness, consistent sheen, and no swirl trails.
A field assessment commonly includes:
- Stone identification: calcite-based (marble/limestone/travertine/onyx) vs. silicate-based (granite/quartzite) vs. engineered quartz; this dictates chemical tolerance and abrasive progression.
- Finish matching: honed vs. polished vs. textured; mismatch is a top reason DIY repairs look “patched.”
- Damage mapping: etches, scratches, chips, cracks, spalls, open seams, and previous coatings.
- Flatness and lippage check: straightedge checks across tile edges and transitions; identifies whether honing alone can blend or whether grinding/leveling is required.
- Moisture and salt indicators: efflorescence at joints, darkening, or recurring haze; influences sealer choice and drying time.
- Test area: a small, controlled demonstration section to confirm the finish and approval before full production.
Core Methods Used in Modern Stone Refinishing
Restoration is a controlled abrasive and chemistry process, not “extra scrubbing.” Technicians choose tools and products to remove damage while maintaining plane and edge definition.
Typical on-site methods (by goal):
- Etch removal (marble/limestone/travertine): honing with diamond abrasives to remove the chemically dulled layer, then polishing to the specified sheen.
- Scratch removal: progressive grits to fully erase the scratch path rather than masking it; the final finish is blended wall-to-wall or to a natural break line.
- Lippage/flatness correction: targeted grinding to reduce trip edges, followed by full honing/polishing so the floor reads uniform.
- Stain treatment: poulticing when staining agents have penetrated; requires correct solvent base (oil vs. dye vs. organic).
- Joint and seam stabilization: re-bonding loose edges, filling voids, and rebuilding joints with materials compatible with movement and exposure.
If the project includes tile joints, understanding the role of grout matters because it is not decorative filler—it is part of the surface system that controls spacing, supports edges, and affects cleanability.
Typical Projects: Interior Floors, Kitchens, Baths, and Exteriors
Most restoration calls fall into repeatable scenarios with known failure modes and proven fixes. Matching the scenario to the correct process prevents recurring haze, fast re-etching, and premature joint failure.
Common interior project types:
- Bathroom vanities and tub decks: etch rings, cosmetics/oil staining, chipped edges near faucets, and hard-water crust at fixtures.
- Showers: soap scum + mineral scale + biological growth in grout lines; requires stone-safe cleaners and detailed rinsing to prevent residue re-deposit.
- Kitchen countertops: dull etch patches on marble, seam discoloration, and oily stains around prep zones.
- Stone and tile floors: traffic lanes, micro-scratching, lippage, and coating failure from improper “shine” products.
Common exterior project types:
- Pool coping (limestone/travertine): spalling, joint cracking, and salt scaling; repairs often include flexible joints and selective stone replacement when the face has delaminated.
- Patios and walkways: movement-driven rocking pavers, sand loss, joint washout, and algae in shaded areas.
- Entryways and façades: soot/airborne contamination and irrigation overspray staining, often needing controlled low-pressure washing and appropriate detergents.
For a detailed maintenance approach that reduces re-soiling and uneven appearance, see Mastering Floor Cleaning Techniques: A Comprehensive Guide in San Diego, CA.
Service Selection: Choosing the Right Procedure Instead of “A Cleaning”
The best results come from selecting a defined procedure with measurable outcomes (etch removed, sheen matched, joints stabilized). A reputable provider will specify the process and the finish target, not just quote a generic cleaning.
Use these decision points:
- If the stone is dull in spots from acids: you need honing and finish matching, not stronger cleaner.
- If you feel edges between tiles: you may need lippage reduction and refinishing rather than sealing.
- If there are chips or missing pieces: you need filling/patching before polishing, or the defects will telegraph through the finish.
- If stains keep returning: the issue may be moisture migration or improper previous coatings; identify and remove the film/coating first.
One targeted option for restoring clarity and gloss after damage is Tile Polishing & Stain Removal, which is designed for controlled refinishing and stain-treatment workflows rather than simple surface washing.
Compulsory Reference Table: Specs That Drive Real-World Outcomes
This table summarizes the technical metrics that typically determine whether restoration holds up long-term. It ties finish results to practical site guidelines used across California homes and commercial spaces.
| Feature / Metric | Specifications | Local Guidelines |
|---|---|---|
| Stone chemistry tolerance | Calcite stones (marble/limestone/travertine/onyx) are acid-sensitive; many granites/quartzites are more acid-resistant but can still be dulled by abrasives or coatings. | Do not use acidic descalers on calcite stone; select neutral or manufacturer-approved cleaners and verify in a test area. |
| Abrasive grit progression | Progressive diamond steps (coarse → medium → fine → finish) are required to fully remove scratches/etches and prevent swirl marks. | California interior projects should control silica dust using HEPA extraction and wet methods consistent with Cal/OSHA requirements for grinding activities. |
| Joint type at transitions | Rigid grout in movement zones cracks; elastomeric sealant handles expansion at perimeters and changes of plane. | In exterior coastal areas, use exterior-grade flexible jointing at coping/expansion areas to reduce recurring cracking from temperature and movement. |
| Sealer category | Breathable penetrating/impregnating sealers reduce absorption without forming a surface film; topical coatings can peel or haze. | For foggy/coastal microclimates, prioritize breathable sealers to avoid trapping moisture that can drive haze/efflorescence. |
| Slip risk after polishing | Higher gloss can reduce traction when wet depending on stone and contaminants; texture and maintenance affect real slip performance. | For entries, bathrooms, and pool decks, match finish to use-case; consider honed or textured finishes where wet traffic is expected. |
What to Expect During a Professional On-Site Visit
A well-run restoration visit follows a predictable sequence that protects the property and produces consistent finish matching. You should see containment, controlled water use, and a clear sign-off step for sheen and feel.
Typical workflow:
- Pre-inspection and documentation: photos, damage map, and agreement on target finish (honed vs. polished) and boundaries (full room vs. section).
- Protection and masking: baseboards, cabinets, metal trims, and adjacent flooring protected from slurry and abrasives.
- Dry soil removal: HEPA vacuuming to prevent grit from creating new scratches during honing.
- Correction phase: grinding/honing/polishing using a defined grit sequence; edges and corners detailed with smaller tools for uniform appearance.
- Rinse and residue control: slurry removal and neutralization to prevent haze and streaking.
- Repairs and joints: chips filled, cracks stabilized, loose pieces reset as specified; joints corrected where needed.
- Sealing (when appropriate): applied to dry, clean stone; excess buffed off to avoid sticky residue.
- Final inspection: verify sheen consistency under job lighting and natural light; confirm slip feel and transitions.
How to Vet a Local Technician Without Guesswork
You can screen quality by asking for process specifics, not marketing claims. The key is whether the provider can explain stone behavior, finish matching, and jobsite controls in plain, verifiable terms.
Use this vetting checklist:
- Method clarity: Ask what steps they will use (clean → hone → polish → seal) and why, based on the stone type.
- Test area policy: Confirm they will do a small test section to verify finish match before proceeding.
- Dust and slurry management: Ask how they control silica dust and where wastewater/slurry goes (not into landscaping or storm drains).
- Product compatibility: Ensure they avoid acids on calcite stone and can explain sealer type (penetrating vs. topical) and cure expectations.
- Repair capability: Confirm they can address chips, seams, and joints—not only “clean.”
- Licensing threshold awareness: If the scope is extensive (resetting, replacement, rebuild), confirm compliance with California’s licensing requirements for projects at or above the $500 threshold.
Maintenance After Restoration: How to Keep the Finish From Failing Early
Post-restoration maintenance is a controlled cleaning routine designed to avoid re-etching, re-depositing minerals, and loading pores with oils. The right routine extends the life of honing/polishing work and reduces how often you need professional refinishing.
Practical maintenance rules that prevent common damage:
- Use pH-neutral cleaners for natural stone: avoid vinegar/citric acids on marble, limestone, and travertine.
- Remove minerals correctly: on calcite stone, do not “scrub harder” with acidic bathroom products; use stone-safe methods to avoid etching.
- Control grit: entry mats and regular vacuuming reduce micro-scratches that dull polished finishes.
- Wipe standing water: especially in showers and around sinks to reduce mineral deposition and soap scum bonding.
- Avoid waxes and acrylic coatings unless specified: they can trap soils and create uneven shine that later requires stripping.
Restoration That Holds Up: The Non-Negotiables
High-quality stone restoration is measurable: the surface is flatter, the sheen is uniform, defects are structurally stabilized, and protection is matched to exposure. When the assessment, abrasive plan, and joint/sealer choices align with California conditions, the result is safer walking surfaces, cleaner maintenance, and fewer repeat failures.
Key takeaways to demand on any project:
- Correct identification of stone type and finish before selecting cleaners or abrasives.
- Defined grit progression to remove damage completely and prevent swirl marks.
- Repair-first sequencing so chips, cracks, seams, and joints don’t telegraph through the final polish.
- Breathable protection where moisture exposure is likely, especially outdoors and in coastal zones.
- Documented scope and test section so the final finish matches expectations before full completion.
Frequently Asked Questions
Stop Guessing — Get Stone Restoration Done Right the First Time
Stone doesn’t “clean up” the way most surfaces do. One wrong product, one aggressive pad, or one DIY descaler can turn a small issue into a permanent one—etching marble in seconds, leaving swirl marks that only show under sunlight, or trapping moisture under the wrong sealer until haze and efflorescence keep coming back. And if you’ve got loose pavers, cracked joints, or spalling coping, patching the surface without addressing movement and exposure can create trip hazards, repeat failures, and costly replacement work you didn’t need in the first place.
A seasoned local pro knows what your stone can tolerate, how to match the existing finish (honed vs. polished vs. textured), and how to correct problems without over-grinding edges, undercutting grout, or sealing in moisture—especially in coastal Del Mar conditions where salt air and humidity punish shortcuts. The goal isn’t “better than before” for a week; it’s a stable, uniform finish that stays cleaner, safer, and easier to maintain.
If you want the job done with a clear plan (test area first), the right abrasives and chemistry, and repairs that don’t telegraph through the final finish, book a professional on-site assessment and get a defined scope you can trust.