Executive Summary
Granite countertop restoration is a step-based process that corrects surface damage through diamond honing/polishing, repairs chips and seams, removes stains with contaminant-specific methods, and finishes with a verified penetrating sealer for long-term protection. The definitive solution is to match the stone type and existing finish with a test spot, then restore uniformly—rather than relying on coatings or quick “buff and shine” fixes.
Core Insights
- Restoration Is Resurfacing, Not a Coating: True restoration removes damage mechanically and chemically, then protects granite with an impregnating sealer instead of waxes or acrylic “shine” products.
- Finish Matching Requires Testing: Pros identify the stone and run a controlled test area to confirm the correct grit progression, especially on haze-prone black stones and resin-textured speckled granites.
- Stains and Defects Need Targeted Methods: Chips, seam voids, oil/moisture marks, and faucet scale each require their own repair or extraction approach before sealing to avoid locking in discoloration or creating patchy sheen.
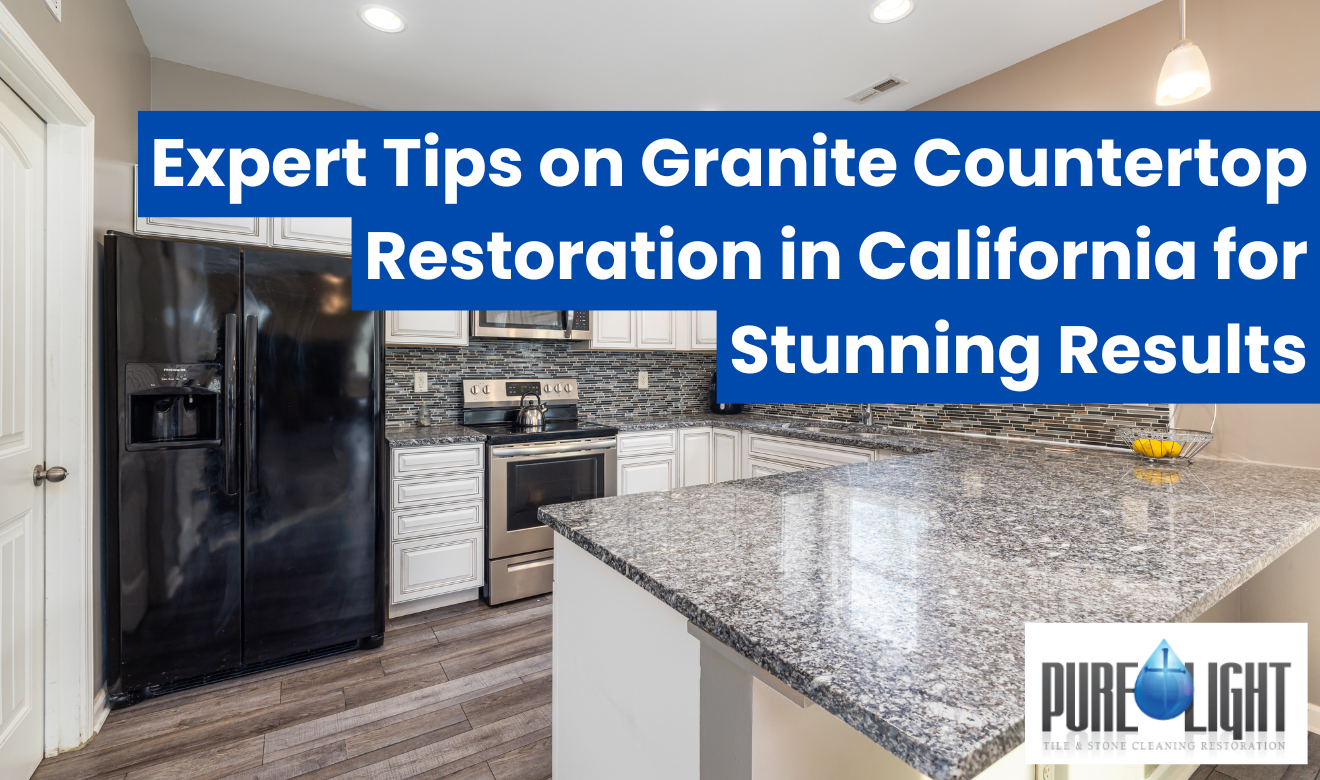
Granite countertop restoration is the professional process of repairing, resurfacing, and resealing granite so it looks uniform, glossy, and stain-resistant again. Homeowners searching for granite countertop restoration near me in California usually need targeted fixes for etching, chips, dull traffic lanes, and dark moisture marks. A proper restoration starts with stone ID and finish matching. Absolute Black often needs a tighter polish sequence to avoid haze. Santa Cecilia and other speckled granites often show resin “orange peel” that requires controlled honing before polishing. Technicians typically use diamond abrasives in stepped grits to level scratches and lippage at seams. They then refine the surface to a honed, satin, or high-gloss finish without dishing around sink rails. Chip repairs commonly use color-matched stone epoxy, then a razor-flat blade scrape and spot-polish to blend the patch. Oil staining near cooktops is often treated with a solvent-based poultice that pulls contaminants from pores over 24–48 hours. Hard-water deposits around faucets are removed with stone-safe acidic substitutes, not vinegar, to avoid surface burn. Final sealing uses a penetrating impregnator selected for the granite’s absorption rate, verified with a timed water-drop test. In California kitchens with high UV and open-window airflow, seal performance is often checked more frequently, especially on lighter granites that show darkening fast when unsealed.
What “Granite Countertop Restoration” Includes (and What It Doesn’t)
Granite restoration is a measurable, step-based resurfacing process that removes damage and returns a consistent finish, then protects it with the correct impregnating sealer. It is not a topical “shine” or wax coat that wears off and attracts residue.
In practical terms, a full restoration plan is built around what the stone is doing at the surface and in the pores:
- Mechanical correction: diamond honing/polishing to remove scratches, dull lanes, and uneven edges (lippage at seams).
- Chemical correction: stain extraction (oil, moisture, rust) with poultices and stone-safe cleaners selected for the contaminant type.
- Localized repair: chips, pits, seam voids, and cracked edges repaired with color-matched epoxy and leveled flush.
- Protection: penetrating/impregnating sealer selected based on absorption testing and finish goals (honed vs. polished).
What restoration does not include is applying acrylic coatings, “stone gloss” oils, or waxes to force shine—those can create blotchy traffic patterns and complicate future honing.
How Pros Identify Granite and Match the Existing Finish
Correct stone identification and finish matching prevents haze, swirl marks, and uneven reflectivity after polishing. A technician should verify both the mineral structure and the current finish level before choosing abrasives or compounds.
Because “granite” in kitchens can range from true granite to granite-like igneous stones, the surface response differs. A reliable workflow typically includes:
- Visual and tactile check: crystal size, resin content, and whether the top has a factory resin coat that can orange-peel.
- Finish reading: comparing reflectivity in multiple directions to spot existing swirl patterns and traffic-lane dulling.
- Absorption screening: timed water-drop test to see if darkening occurs and how quickly (guides sealer selection).
- Small test area: a controlled hone/polish test to confirm the exact grit progression that matches the surrounding field.
Dense black stones (commonly sold as Absolute Black) often require a tighter, more controlled polishing sequence to avoid gray haze. Speckled stones (like Santa Cecilia) often reveal resin texture after aggressive steps, so the best result is achieved through uniform honing before refining to the final sheen.
Common Damage Patterns in California Kitchens (and the Correct Fix)
Most countertop failures are predictable: dull lanes from abrasion, edge chips from impacts, dark marks from absorbed liquids, and mineral deposits from water. Each issue needs a different corrective method—one product cannot fix all of them.
- Dull traffic lanes: caused by micro-scratching from daily wiping with gritty debris; corrected by honing to the lowest scratch depth, then polishing back to the target finish.
- Chips on sink rails and corners: impact damage; corrected with knife-grade stone epoxy, leveled flush, then spot-refined with matching abrasives.
- Dark moisture marks: often trapped water in porous areas or beneath residue; corrected by drying protocols and, if needed, a poultice designed for moisture/oil lift.
- Oil staining near ranges: corrected with a solvent-based poultice that stays wet long enough to draw oils out of pores (commonly a 24–48 hour dwell, depending on conditions).
- Hard-water scale around faucets: mineral buildup; removed with stone-safe descaling methods—household vinegar is not a controlled stone-restoration product and can damage adjacent materials and finishes.
When homeowners search for granite countertop restoration near me, these are the exact conditions a qualified technician should diagnose and map into a step-by-step scope rather than a generic “buff and seal.”
Diamond Honing & Polishing: The Standard Restoration Sequence
Professional resurfacing is built on stepped diamond abrasives that level the surface uniformly without dishing or creating low spots. The goal is to remove damage by controlled material removal, then refine scratches until the desired sheen is achieved.
A field-proven approach generally follows this logic:
- Protection & masking: tape off adjacent wood, painted drywall, and delicate fixtures; set up splash control.
- Flattening where needed: correct lippage at seams or ledges first so later polishing doesn’t “telegraph” uneven transitions.
- Honing steps: run diamond grits in progression, ensuring each step removes the scratch pattern from the previous grit.
- Edge consistency: polish edges and sink rails with matching abrasives so the reflection and color tone match the field.
- Final refinement: polish to honed/satin/gloss as requested, with careful control on dark stones to prevent haze.
Technicians should avoid “spot buffing” dull lanes without blending into surrounding areas—partial polishing often creates visible halos, especially under under-cabinet lighting.
Chip Repair, Seam Touch-Ups, and Joint Stabilization
Granite repairs succeed when the fill is structurally sound, color-matched, and leveled perfectly flush before polishing. A repair that is proud (too high) or dished (too low) will remain visible even after sealing.
High-quality chip and seam work typically includes:
- Clean and dry the cavity: remove oils/soap film so epoxy bonds properly.
- Color match: tint epoxy to match the base tone and, where needed, mimic small specks.
- Fill in layers if required: deeper voids may need staged filling to prevent shrinkage.
- Razor-flat leveling: blade scrape to dead flush with the surface plane.
- Spot-hone and spot-polish: refine the patch so gloss and texture match adjacent stone.
For damaged seams or unstable joints, a dedicated seam/joint scope should be used rather than only cosmetic filling. Where appropriate, consider Stone Countertop Seam and Joint Repair to correct visible separation, edge mismatch, and voiding that collects debris.
Stain and Deposit Removal: Matching Chemistry to the Contaminant
Granite stain removal is not one-size-fits-all; the correct method depends on whether the discoloration is oil, metal, organic dye, or mineral scale. Using the wrong chemistry can lock staining in or damage adjacent materials.
Common categories and what usually works best:
- Oil/grease: solvent-based poultice designed to dissolve oils and pull them out as it cures.
- Organic stains (coffee, tea, food dyes): oxidizing poultice systems can be effective, but must be compatible with the stone and any resin content.
- Rust: targeted rust removers formulated for natural stone; avoid unknown acids that can etch surrounding materials.
- Hard-water deposits: controlled descaling products labeled safe for natural stone; mechanical detailing may be needed around faucets and escutcheons.
Before any sealer is applied, the surface must be fully cleaned of residues—sealants can trap contaminants and make discoloration appear permanent.
Sealing Granite Correctly (Penetrating Impregnators, Not Coatings)
Granite is best protected by a penetrating impregnator that lines pore structure without forming a topical film. The correct sealer choice is determined by absorption behavior, finish level, and exposure (cooktop oils, sink water, UV).
A defensible sealing protocol includes:
- Timed water-drop test: check whether the stone darkens and how quickly (a practical indicator of absorption).
- Product selection: use a penetrating/impregnating sealer rated for natural stone; avoid acrylic “shine” coatings.
- Controlled application: apply evenly, allow proper dwell, then remove all excess from the surface to prevent streaking.
- Cure time: keep the surface dry and free of cleaners until cured per label directions.
- Performance check: re-test with a water drop after cure; reapply only if the stone still darkens rapidly.
In many California homes with open-window airflow and strong ambient light, it’s smart to monitor lighter granites more often because visible darkening from water can show quickly when protection is fading.
Quality Control Checklist Homeowners Can Use During a Walkthrough
A restoration job is easy to verify if you know what to look for: uniform reflectivity, flatness at seams, and no leftover residue. A walkthrough should confirm the work meets a measurable standard, not just “looks better.”
- Uniform sheen: view from multiple angles under under-cabinet lights; no cloudy zones or “patchy shine.”
- Edge-to-field match: edges and sink rails should match the main surface in both gloss and color tone.
- Seams feel flat: run fingertips across seams; lippage should be corrected where feasible.
- No swirl marks: dark stones show this most; inspect with a flashlight at a low angle.
- Repairs are flush: chip fills should not catch a fingernail and should blend visually at normal standing distance.
- Sealer is not streaked: no sticky spots, rainbowing, or dull smears that indicate excess left on the surface.
If surrounding tile or joints are part of the same kitchen maintenance plan, understanding how grout behaves (porosity, soil retention, and sealing needs) helps prevent cross-contamination from harsh cleaners migrating onto the stone.
Core Specifications and Local Practical Guidelines (California Kitchens)
The table below summarizes the most important restoration metrics: what is being corrected, what specification matters, and what on-site guideline keeps results consistent. Use it as a quick scope reference when comparing providers.
| Feature / Metric | Specifications | Local Guidelines |
|---|---|---|
| Finish matching | Honed, satin, or polished finish must be uniform across field, edges, and sink rails; no haze on dark stones | Verify under under-cabinet lighting and daylight; California kitchens often have mixed lighting that reveals swirl/haze |
| Scratch removal approach | Use stepped diamond abrasives; each grit must fully remove the previous grit’s scratch pattern | Demand a test spot before full run; avoid partial “buff-only” fixes that create halos |
| Seam flatness (lippage control) | Seams should transition smoothly; no sharp ridge that catches fingers or traps debris | Request seam inspection at multiple points; movement can be worse near sinks and dishwashers |
| Chip repair blending | Color-matched epoxy, leveled flush, then spot-refined to match surrounding sheen | Inspect repairs at standing height and at low angle; strong California sunlight can make mismatches obvious |
| Stain treatment dwell time | Poultice typically requires extended contact to pull contaminants from pores (often 24–48 hours depending on stain type and environment) | Ensure area is protected from splashes and cooking during dwell; ventilation and temperature affect cure and pull strength |
| Sealer verification | Penetrating impregnator chosen based on absorption; excess must be buffed completely off surface | Perform a timed water-drop test after cure; lighter stones in coastal/inland transition zones can show darkening quickly |
Care After Restoration: What Preserves the Finish the Longest
Post-restoration care is simple but specific: reduce abrasion, prevent oil dwell time, and avoid unapproved chemicals that can leave film or degrade sealers. The goal is to keep the scratch rate low and stop contaminants before they absorb.
- Daily cleaning: microfiber + pH-neutral stone cleaner; avoid gritty powders that reintroduce micro-scratches.
- Spill response: blot oils and pigments quickly; do not spread them with wet wiping first.
- Cutting protection: use cutting boards; knife work can leave metal transfer and micro-chipping on edges.
- Heat protection: use trivets; rapid temperature changes can stress resinous areas and seams.
- Avoid film-formers: no waxes or “polish sprays” that build residue and cause uneven sheen.
For practical kitchen-safe cleaning habits that reduce staining and dullness across multiple countertop materials, see 5 immediate cleaning tips for various countertop materials in San Diego, CA.
“Restored Like New” Results: What That Actually Means
A like-new restoration means consistent reflectivity, smooth transitions, corrected defects where feasible, and verified protection based on absorption—not a temporary shine. When you evaluate granite countertop restoration near me, the best providers will explain the exact grit progression, stain method, and sealer verification used for your specific slab.
Use these measurable outcomes to judge success:
- Uniform finish: no cloudy patches, swirl trails, or edge/field mismatch.
- Repairs that disappear at normal distance: chips and pits are flush and visually blended.
- Reduced staining sensitivity: water and common kitchen liquids bead longer and darken the stone less after cure.
- Cleaner maintenance cycle: fewer stubborn rings around faucets and less grime sticking near seams.
When restoration is done with proper honing, controlled polishing, correct stain extraction, and a penetrating sealer verified by testing, granite regains the crisp color, clarity, and durability it was installed for—without coatings that fail prematurely.
Frequently Asked Questions
Stop Guessing—Restore Your Granite the Right Way (Before “Quick Fixes” Make It Worse)
Granite countertop restoration isn’t a wipe-on shine job—it’s a precision process. And when it’s done wrong, the damage isn’t just cosmetic. DIY “polish” sprays can leave sticky film that traps grime and creates uneven traffic patterns. Random abrasives can lock in swirl marks you’ll see forever under under-cabinet lighting. The wrong chemical around faucets can burn nearby finishes, discolor resin-rich slabs, or turn a simple hard-water ring into a permanent dull spot. Even well-meaning spot-buffing can create halos that make the countertop look patchy from across the kitchen.
If your counters have haze on dark stone, dull lanes, seam lippage, chips at sink rails, or mysterious dark marks, you don’t need another product—you need a controlled test spot, the correct diamond sequence, proper stain extraction, and sealing that’s verified by absorption testing. That’s how you get a uniform finish that actually lasts, not a temporary shine that fails in weeks.
Get a local pro who can identify your stone, match your existing finish, and restore it with measurable steps—so you don’t waste time, waste money, or permanently change the look of your slab trying to “figure it out.”