Executive Summary
Professional marble floor polishing in Carlsbad restores true reflectivity by removing etching and micro-scratch haze through controlled honing and polishing—not by applying temporary shine coatings. The definitive fix is a finish-matched, progressive diamond refinement process with detailed edge work and side-light inspection to ensure uniform clarity across the entire floor.
3 Core Insights
- Coastal Grit Is the Primary Abrasion Driver: Windblown sand and tracked-in beach grit create fine scratch haze that dulls marble even when the surface looks “clean.”
- Etch Marks Require Honing Before Polishing: Acid damage from lemon, vinegar, or wine must be re-leveled with the correct grit progression or it will remain visible under any “polish.”
- Uniform Results Depend on Edge Detailing and Verification: Proper tooling for corners, thresholds, and grout edges—followed by strong side-light inspection—prevents swirl marks, picture-framing, and patchy sheen.
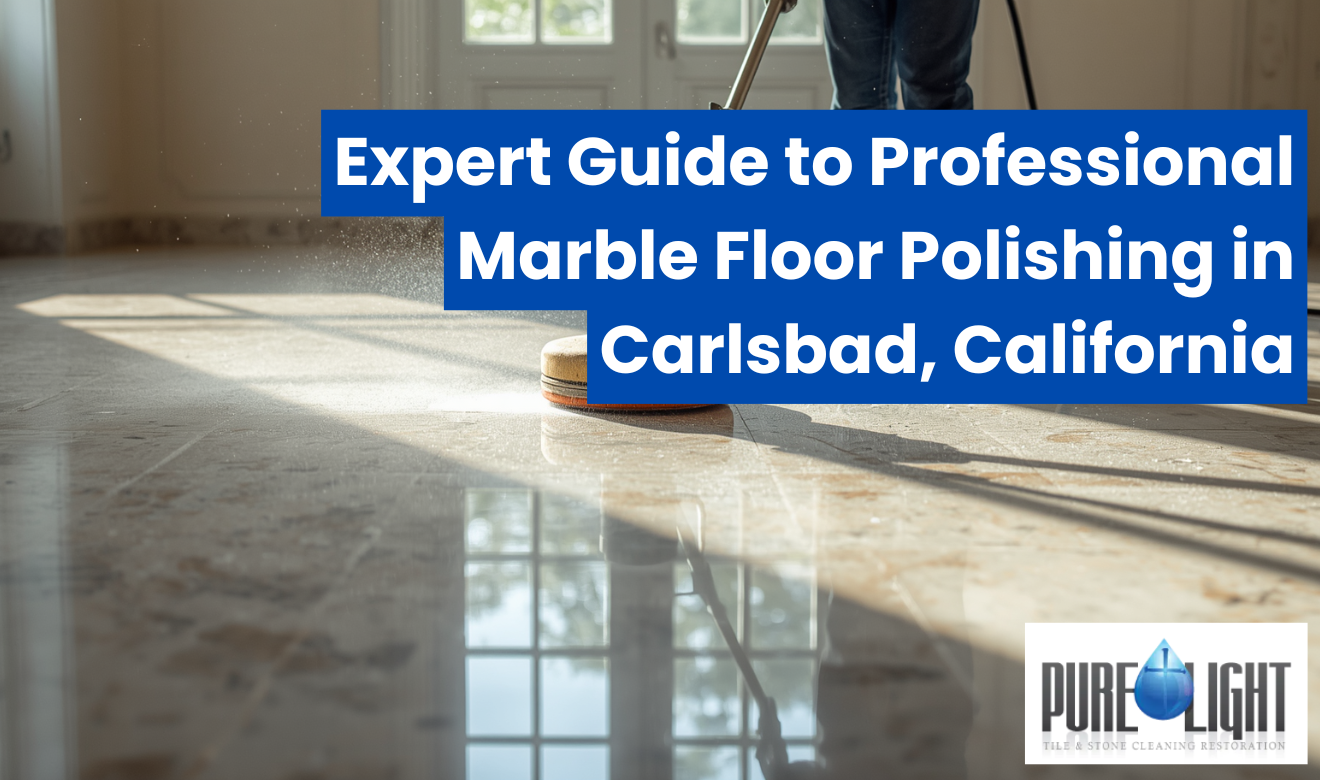
Professional marble floor polishing Carlsbad is a controlled restoration process that levels microscopic scratches, removes etching, and brings marble back to a high-gloss or honed finish. In Carlsbad homes near the coast, salt air and tracked-in sand from Tamarack State Beach can grind into entryway marble and dull the surface. In kitchens and hallways, acidic spills like lemon juice, vinegar, or wine can etch calcite-rich marble and leave pale, matte spots that normal mopping cannot fix. A proper polishing service starts with on-site stone identification and finish matching, then uses progressive diamond abrasives to refine the surface, followed by marble-safe polishing compounds to rebuild clarity. Grout edges, thresholds, and tight corners are detailed with smaller tooling to prevent swirl marks and uneven sheen. Floors are then cleaned with neutral-pH solutions, inspected under strong side lighting to confirm uniform reflectivity, and finished with slip-awareness and traffic planning that fits busy Carlsbad households.
Why Marble Floors in Carlsbad Lose Their Shine Faster Than Expected
Coastal conditions and daily abrasion create predictable wear patterns on marble, especially in entries, kitchens, and main corridors. The dulling you see is typically a combination of micro-scratches, mineral etching, and embedded grit—not “dirty stone.”
Carlsbad homes commonly experience faster marble wear because:
- Windblown sand and tracked grit behave like sandpaper under shoes and pet paws, cutting fine scratches that scatter light.
- Salt air and humidity increase residue on floors and can accelerate buildup of cleaners that are not stone-safe.
- Acid contact etches calcite (a primary component in many marbles), creating pale marks that remain even after thorough cleaning.
- Improper cleaners (acidic bathroom products, vinegar mixes, some “all-purpose” sprays) can create repeated surface damage.
Polishing is not cosmetic “waxing.” It is a controlled abrasion and refinement process that restores optical clarity by re-leveling the marble’s top surface.
What “Professional Marble Floor Polishing” Actually Means (and What It Does Not)
True polishing restores reflectivity by refining the stone itself, not by coating it with a temporary shine layer. If a contractor is relying on topical finishes to create gloss, the floor will usually haze, peel, or show traffic lanes quickly.
In a correct restoration workflow, polishing is the final step after the surface has been properly corrected. It typically involves:
- Finish matching (high-gloss polish vs. satin/honed) so repaired zones do not look “patchy.”
- Progressive diamond refinement to remove scratch haze and flatten uneven wear patterns.
- Polishing compound selection designed for calcium-based stones (marble, limestone, travertine), not generic floor buffers.
Polishing does not fix structural issues such as loose tiles, hollow spots, cracked subfloor movement, or major lippage without additional mechanical correction and repair steps.
Marble Identification and Finish Matching: The Step That Prevents Costly Mistakes
On-site stone verification and finish matching determine the abrasives, chemicals, and target sheen before any grinding begins. This is where many DIY and low-cost jobs fail—by treating all stone like the same material.
Before polishing, a qualified technician should verify:
- Stone type: true marble vs. limestone, dolomitic marble, serpentine “green marble,” or a polished porcelain look-alike.
- Surface finish: polished (high reflectivity) vs. honed (low sheen) vs. brushed/leathered (textured).
- Previous treatments: topical coatings, waxes, impregnating sealers, or prior crystallization.
- Slip considerations: whether a high-gloss finish is appropriate for the location and household traffic patterns.
This step also sets expectations: etching can usually be removed through honing/polishing; deep chips or missing stone require filling or patch repair before refinement.
Controlled Restoration Workflow Used for Marble Floor Refinishing
Professional restoration follows a predictable sequence: correct damage first, then refine, then polish, then detail and inspect. Skipping steps produces swirl marks, uneven sheen, and “picture-framing” along edges.
A standard professional workflow typically includes:
- Site protection and prep
- Masking adjacent wood, baseboards, stainless, and soft metals (polishing compounds can stain or haze them).
- Dry debris removal to prevent dragging grit across the floor.
- Deep cleaning (stone-safe)
- Use of neutral-pH cleaning agents and controlled agitation to remove soils without etching.
- Edge-line and grout line detailing to remove trapped debris that causes re-scratching.
- Honing with diamond abrasives
- Progressive grit steps to remove etches and scratches instead of “buffing over” them.
- Cross-hatch passes to level the surface consistently.
- Polishing step
- Use of marble-appropriate polishing powders/compounds to restore clarity.
- Consistent dwell time and pressure to avoid burn marks and cloudy zones.
- Detail work and inspection
- Hand/detail tooling for corners, toe-kicks, thresholds, and tight turns.
- Inspection under raking/side lighting to reveal swirl marks and incomplete scratch removal.
If the floor includes significant height differences between tiles, mechanical correction may also include Tile Lippage Removal before final polishing so the finish reads smooth and uniform under light.
Etching vs. Scratching vs. Dulling: How to Diagnose the Problem Correctly
Marble damage types look similar to homeowners, but they require different corrective depths. Correct diagnosis prevents under-treatment (marks come back) or over-grinding (unnecessary material removal).
- Etching (chemical damage): typically lighter, matte spots caused by acids reacting with calcite; feels smooth but looks dull.
- Scratches (mechanical damage): lines or haze from abrasion; can catch a fingernail if deeper.
- Embedded soil / residue: darkened traffic lanes caused by contamination or improper cleaners; may improve with deep cleaning but often coexists with scratch haze.
Most “my marble looks cloudy” complaints are a blend of fine scratching plus etch spots. Polishing alone cannot remove deeper etches unless the surface is first honed to the appropriate level.
Key Specifications Homeowners Should Ask For Before Work Starts
Clear, pre-work specifications reduce the risk of mismatched sheen, swirl patterns, and recurring haze. A professional scope should describe what will be corrected and what will be protected.
Ask for these deliverables in writing:
- Target finish: honed vs. polished, and whether an adjacent room must be matched.
- Damage removal goal: e.g., “remove etching and reduce scratch haze to uniform reflectivity” rather than a vague “make it shiny.”
- Edge and corner plan: confirmation that corners/thresholds will be detailed with appropriate tooling.
- Protection measures: dust control approach, masking, and cleanup steps.
- Post-care plan: approved cleaner type, maintenance intervals, and spill response rules.
Marble, Grout Lines, and Why the “Small Details” Show the Most
Perimeter edges, grout lines, and transition strips are where uneven sheen and residue are easiest to see. Proper detailing prevents “frame lines” and dull borders that make the center look artificially glossy.
Even though marble is the focus, grout condition affects the final appearance because:
- Dirty or recessed grout creates dark outlines that visually reduce the clarity of polished stone.
- Grout haze or residue can re-deposit during polishing if the floor is not fully rinsed and extracted.
- Grout at edges traps sand and acts as a scratch source when walked over repeatedly.
In many homes, pairing marble restoration with grout-focused cleaning is what makes the entire floor look “new” rather than merely “brighter.” For maintenance strategies that reduce re-soiling, see mastering floor cleaning techniques for practical, stone-compatible routines.
Process and Local Use-Case Table: What to Expect in Carlsbad Homes
The table below converts marble restoration into measurable features so homeowners can compare scopes consistently. Use it to confirm the contractor is addressing coastal grit, kitchen acids, and edge detailing—not just running a buffer.
| Feature / Metric | Specifications | Local Guidelines |
|---|---|---|
| Surface damage addressed | Etching removal via honing + scratch refinement via progressive diamond abrasives + final polishing compound | Prioritize entryways and beach-access paths where sand abrasion is highest; confirm edge/corner tooling for tight coastal home layouts |
| Cleaner chemistry used | Neutral-pH stone cleaner; avoid acidic or alkaline degreasers that can etch or dull calcium-based stone | In kitchens, require a spill-response plan for citrus, vinegar, and wine; avoid “DIY vinegar mopping” because it predictably etches marble |
| Finish consistency verification | Inspection under strong side lighting; confirm uniform reflectivity across field tiles and edges | Request inspection at the time of day when glare enters (common in bright coastal interiors) to reveal swirl marks early |
| Edge, threshold, and corner detailing | Use smaller-format diamonds and hand/detail tools to prevent “picture framing” and missed etches near baseboards | Focus on sliding door thresholds and garage-entry transitions where sand accumulates and is repeatedly ground into the stone |
How to Maintain the Restored Finish Without Re-Etching or Re-Scratching
Maintenance is about preventing new abrasion and chemical reaction, not adding shine products. A few controlled habits extend the restored finish significantly, especially in coastal traffic patterns.
Use this marble-safe maintenance plan:
- Dry soil control first: use entry mats and remove grit before it becomes scratches; vacuum with a soft brush attachment.
- Wet clean second: damp mop with a neutral-pH stone cleaner; rinse if residue remains.
- Immediate acid response: blot (do not wipe) spills like citrus, soda, wine; then clean with stone-safe cleaner and water.
- Avoid these common causes of repeat damage:
- Vinegar, bleach, ammonia mixes, and “bathroom descalers” on marble
- Abrasive powders or scrub pads
- Coating-type “shine in a bottle” products that trap dirt and create uneven traffic lanes
If your household has heavy beach traffic, schedule periodic professional deep cleaning to remove grit from grout edges and micro-texture before it becomes another scratch cycle.
When Polishing Alone Isn’t Enough: Repairs and Mechanical Corrections
Some marble problems require filling, leveling, or focused scratch removal before the final polish step. Addressing these issues first prevents the restored finish from highlighting defects under light.
Consider additional restoration steps when you see:
- Chips or missing edges: may require resin or epoxy repair and color blending before honing.
- Cracks or movement lines: need evaluation for structural movement; polishing will not stabilize a moving substrate.
- Uneven tile edges (lippage): often requires grinding/leveling for safe transitions and a visually flat reflection.
- Isolated deep scratches: may require targeted honing zones to avoid removing excess material across the entire floor.
A Clear Finish You Can Keep: Practical Takeaways for Carlsbad Marble Floors
Effective marble polishing is a measurable restoration system: identify the stone, correct etches and scratches through controlled honing, rebuild clarity with appropriate polishing compounds, and verify the finish under side lighting. For Carlsbad homes, the winning strategy is combining restoration with sand control at entries and strict avoidance of acidic cleaners that react with calcite.
To keep results consistent long-term:
- Stop grit at the door with mats and regular dry removal.
- Use only neutral-pH cleaners designed for natural stone.
- Blot acids immediately and avoid DIY vinegar routines.
- Make sure edges, thresholds, and corners are detailed during service so the whole floor reflects evenly.
When done correctly, the restored surface reads uniform from every angle—no dull borders, no swirl halos, and no patchwork sheen—just marble that looks the way it was meant to look.
Frequently Asked Questions
Stop Letting Coastal Grit and Kitchen Acids Ruin Your Marble—Get It Professionally Polished the Right Way
Marble doesn’t “just get dull.” In Carlsbad, it gets sanded down—day after day—by windblown grit and tracked-in beach sand, then permanently marked by common household acids like lemon, vinegar, and wine. And the longer you wait, the more those microscopic scratches and etch spots stack up until the floor looks cloudy no matter how much you mop.
Trying to DIY this (or hiring a bargain “buffer-and-go” crew) is where expensive mistakes happen fast. The real risk isn’t just “meh results”—it’s permanent damage that costs more to undo than doing it correctly the first time.
- Wrong products can etch on contact: many “stone cleaners,” all-purpose sprays, and DIY vinegar mixes quietly eat away the surface and expand matte spots.
- Topical shine coatings backfire: they may look good for a week, then haze, peel, and create traffic lanes that trap grit and accelerate wear.
- Improper polishing creates swirl marks and patchy sheen: especially along edges, thresholds, and tight corners where cheap tools can’t reach evenly.
- Over-grinding removes unnecessary stone: once material is taken off, you can’t put it back—bad technique permanently changes the floor’s look and longevity.
- Missed grit at grout edges re-scratches your finish: if the prep and detailing aren’t done right, your “restored” marble can start dulling again almost immediately.
You don’t need a temporary shine. You need a controlled restoration process that identifies your stone, matches your finish (polished or honed), removes etching and scratch haze with progressive diamond refinement, and verifies uniform reflectivity under strong side lighting—so the floor looks consistent from every angle, not just in one spot.
If you want your marble to look clear, even, and truly restored (without haze, halos, or dull borders), get a local Carlsbad specialist who understands coastal wear patterns and knows how to polish marble without cutting corners.