Executive Summary
Professional marble floor polishing in Poway is a controlled, multi-step abrasion-and-refinement process that removes etching and micro-scratches, restores clarity, and produces a uniform finish across the entire floor plane—without relying on waxes or topical “shine” films. The definitive outcome depends on correct inspection, disciplined grit progression, strict water/slurry control, and detailed edge/transition work so results hold up under Poway’s dust, decomposed granite fines, and strong natural light.
3 Core Insights
- It’s Mechanical Restoration, Not a Coating: True polishing removes damage (etching and wear haze) by leveling and refining the stone surface rather than masking problems with waxes, sprays, or temporary gloss agents.
- Grit Sequencing Determines Clarity and Flatness: Starting with the least aggressive grit that fully removes damage and stepping through a complete progression prevents leftover etches, swirl marks, and unnecessary material loss or dish-out.
- Edge/Slurry Control Separates “Good” From “Professional”: Consistent results require clean rinse practices, frequent slurry extraction, dry inspections, and dedicated edge/threshold tooling so perimeters and transitions match the field without haze or halos.
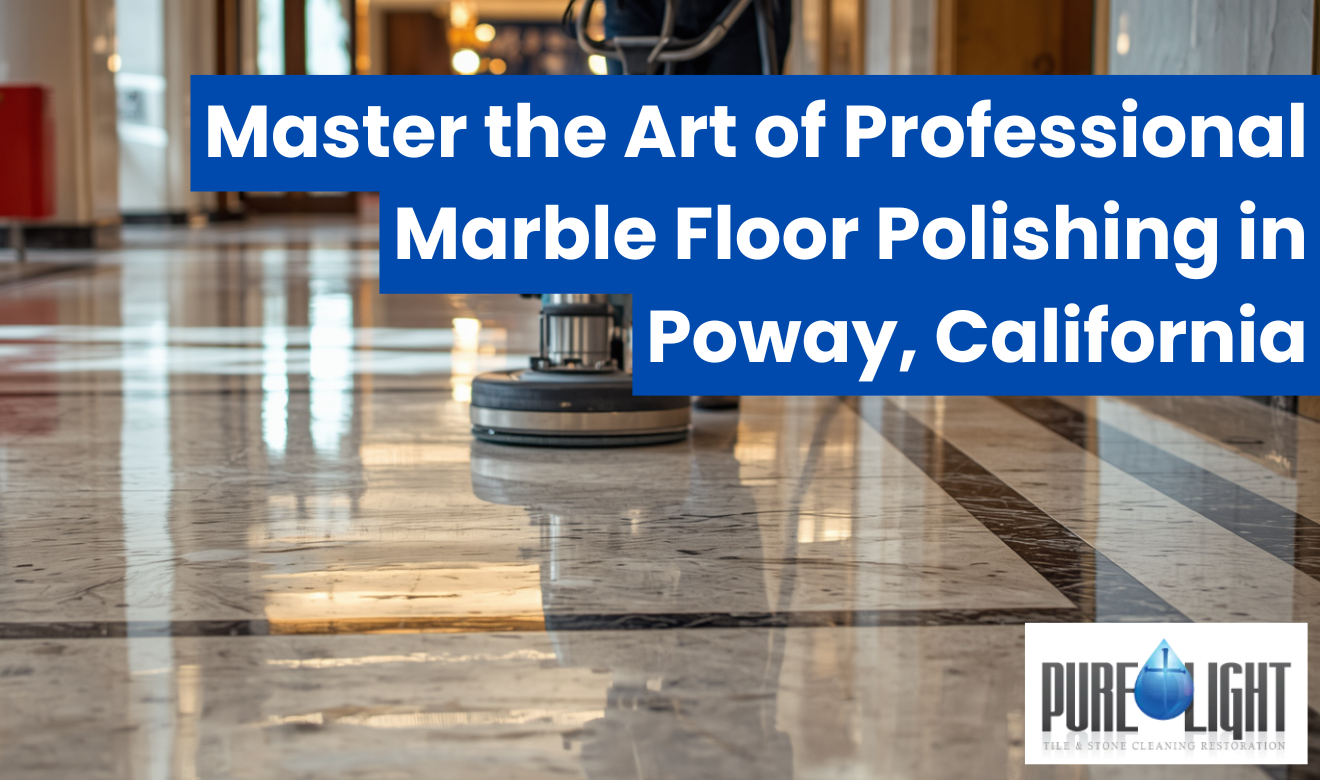
Professional marble floor polishing Poway is a multi-step restoration process that levels micro-scratches, refines the surface, and rehones marble to a high-clarity finish. In Poway homes near Old Poway Park and in business corridors along Poway Road, marble often dulls from fine dust, tracked-in decomposed granite, and repeated foot traffic. Calcium-based stone also etches fast from common acids. Lemon juice, vinegar cleaners, wine, and some bathroom products leave light, cloudy spots. Proper polishing starts with inspection under angled light to map etching, lippage, and worn traffic lanes. Technicians then select diamond abrasives by grit. They may begin around 200–400 grit to cut damage and progress through 800–3000 grit for clarity. Water control matters on marble. Too little water can overheat resin pads. Too much water can float slurry and reduce cut. Edges, thresholds, and shower pans need separate tool passes to avoid swirl marks and uneven sheen. A final refinement step boosts reflectivity while keeping the floor flat, slip-aware, and uniform across grout lines, inlays, and open-plan transitions.
What “Professional Marble Floor Polishing” Means in Real-World Terms
Professional marble floor polishing is controlled abrasion followed by refinement to restore clarity, remove etching, and normalize gloss across the entire plane of the floor. It is not a topical wax or “shine spray,” and it should not leave a plastic-looking film or change the stone’s flatness.
Marble is a calcium carbonate stone, so acids react chemically and create dull etch marks even when the surface is otherwise clean. A correct process targets the three issues homeowners and facility managers see most often:
- Etching (chemical damage): cloudy rings and light spots from acidic spills or bathroom products.
- Micro-scratching (mechanical wear): traffic lanes that look gray, hazy, or “dusty” under window light.
- Unevenness (lippage / dish-out): edges higher than adjacent tiles, or soft grout lines creating a wavy reflection.
In Poway, tracked-in decomposed granite fines and dry dust can behave like sandpaper under shoes, increasing abrasive wear. That is why the most durable results come from a method that restores the surface mechanically and then sets a maintenance plan that prevents re-scratching.
On-Site Evaluation: The Inspection Steps That Control the Outcome
A high-end result starts with inspection under raking (angled) light and a written plan for abrasives, water control, and edge detailing. This limits swirl marks, inconsistent sheen, and “spot polishing” that leaves halos.
Before any pad touches the floor, technicians typically document:
- Stone type and finish: polished marble vs. honed marble (the restoration route differs).
- Etch pattern mapping: kitchens, bar areas, vanities, and shower entries often show concentrated etching.
- Traffic lane wear: entry-to-kitchen runs, hallways, and in front of refrigerators/sinks.
- Lippage and floor flatness: checked with a straightedge to determine if grinding is needed before polishing.
- Grout condition: cracked grout, missing grout, or high/low grout lines that can telegraph through the finish.
Grout joint performance matters because grout is a different material than marble and responds differently to abrasion and chemicals. If you want a primer on what grout is and why it fails, see grout for the baseline definition and composition.
Abrasive Progression: How Grit Selection Removes Etching Without Overcutting
Diamond abrasives are chosen to match the depth of damage, then stepped up in grit to refine clarity and reflection. Skipping grits or starting too fine leaves etches behind; starting too coarse removes unnecessary stone and can create dish-out.
A common professional approach for etched, worn marble floors uses a staged progression such as:
- Damage removal (cut): typically 200–400 grit resin diamonds for moderate etching and scratch haze.
- Refinement (hone): 800–1500 grit to eliminate the previous scratch pattern and build a uniform sheen.
- Polish (clarity): 3000 grit and/or a marble polishing compound to reach high reflectivity.
Key controls that separate professional work from “buffer shine” include:
- Consistent overlap and patterning: cross-hatching passes reduce directional scratch lines.
- Edge sequencing: edges and tight areas are cut and refined to the same grit endpoint as the field.
- Verification between steps: slurry is removed and the surface is inspected under strong light before moving up a grit.
Water and Slurry Management: The Technical Detail That Prevents Haze and Swirls
Marble polishing is a wet process where water volume and slurry removal directly affect cutting efficiency and final clarity. Too little water can overheat pads and leave resin transfer; too much water can hydroplane pads and reduce abrasion.
On-site best practices commonly include:
- Controlled misting: enough lubrication to keep diamonds cutting cleanly without flooding the floor.
- Frequent slurry extraction: using wet vacuums so spent abrasive and stone fines do not re-scratch the surface.
- Clean rinse between grits: prevents cross-contamination (coarse grit residue will visibly scratch at higher steps).
- Dry-down inspection: etches and micro-scratches hide when wet; final evaluation must be done dry.
This is especially important in open-plan Poway homes where sunlight from large windows will reveal any uneven scratch pattern immediately.
Edges, Thresholds, and Wet Areas: Where Most DIY and Low-End Work Fails
Most visible “bad polishing” problems happen at edges and transitions, not in the center of the room. A uniform finish requires specialized tooling and additional time along baseboards, toe-kicks, and doorways.
Areas that require separate tool passes and technique adjustments:
- Perimeters and corners: smaller diameter tools to match the field sheen without leaving half-moons.
- Thresholds and saddle transitions: blending marble to adjacent tile/wood without creating a dull strip.
- Shower pans and bathroom entries: careful slip-awareness; polishing increases reflectivity but must be managed responsibly in wet zones.
- Inlays and borders: different stones can cut at different rates; the technician must avoid creating relief at material boundaries.
If the floor includes ceramic or porcelain adjacent to marble (common in bathrooms), transitions often benefit from coordinated cleaning so the whole space looks consistent. If needed, Tile & Grout Cleaning can be paired with marble restoration to reduce contrast between bright stone and darkened joints.
When Polishing Is Not Enough: Grinding, Lippage Removal, and Repairs
Polishing restores the top finish, but it cannot correct physical height differences or deep fractures without additional steps. If the reflection looks “wavy,” or you can feel edges with your foot, the floor may need flattening work before refinement.
Common add-on restoration steps for marble floors:
- Diamond honing (restorative honing): used when etching is widespread and deeper than typical spot damage.
- Lippage removal: precision grinding to reduce tile edge height differences, improving safety and appearance.
- Chip/crack repair: color-matched fills and leveling before final honing/polishing so repairs finish flush.
- Stain diagnostics: organic vs. metal vs. oil staining requires different poultice chemistry; stains are not “polished out” the way etches are.
For homeowners who are troubleshooting persistent haze, etching, or residue from cleaners, the maintenance behaviors matter as much as the restoration work. Practical guidance on day-to-day care is covered in 5 tips to clean your marble in San Diego CA, which aligns well with maintaining a freshly refined surface.
Process Specifications Table: What to Expect From a Proper Marble Restoration Visit
This table converts the restoration workflow into objective checkpoints you can use to compare bids and scope. It focuses on measurable process controls: inspection, abrasive sequencing, water/slurry handling, and post-care requirements.
| Feature / Metric | Specifications | Local Guidelines |
|---|---|---|
| Initial inspection method | Raking light evaluation; identify etches, scratches, lippage, coating residues; confirm finish target (honed vs polished) | Poway dust and decomposed granite fines increase abrasion—plan for traffic lanes and entry paths first |
| Typical abrasive range | Start 200–400 grit for damage removal; refine through 800–1500; finish at 3000 and/or polishing compound | Select the least aggressive starting grit that fully removes etching to avoid unnecessary material loss |
| Water/slurry control | Controlled wet polishing; frequent slurry extraction; rinse between grits to prevent cross-contamination | Indoor/outdoor dust migration is common—use entry mats and periodic damp mopping to reduce re-scratching after service |
| Edge and corner finishing | Dedicated edging tools/pads; match grit endpoint to field; avoid swirl marks and half-moon patterns | Open-plan lighting and large windows will highlight edge mismatch—require consistent sheen at baseboards and thresholds |
| Post-polish surface verification | Dry inspection under strong light; confirm uniformity across grout lines, inlays, and traffic lanes | Verify appearance both daytime (sunlight) and nighttime (overhead lighting) if possible |
Safety and Building Considerations: Slip Awareness and Chemical Compatibility
Restoring gloss should never ignore slip risk, especially at entries and wet-adjacent zones. Marble itself is not inherently “unsafe,” but water, soaps, and smooth finishes can reduce traction.
Practical safety controls used in professional work:
- Finish selection by area: polished in living areas; honed or refined satin near showers if traction is a priority.
- Residue-free final rinse: leftover polishing compound or detergent creates a slick film and attracts soil.
- Entry protection: mats that capture grit reduce both slipping and abrasion.
Chemical compatibility rules for marble are non-negotiable:
- Avoid acidic cleaners: vinegar and many “lime scale” removers etch calcium carbonate stone.
- Use pH-neutral stone cleaners: to prevent dulling and streaking.
- Spot-test bathroom products: some shampoos and sprays can etch if left to dwell on stone.
Maintenance After Polishing: Keeping the Floor Clear Instead of Re-Scratching It
After polishing, maintenance should focus on grit control and pH-neutral cleaning so the refined surface stays clear. The fastest way to ruin a restored floor is allowing abrasive soil to build up and then grinding it in with dry mopping or dirty pads.
Recommended care plan for marble floors in active Poway households and storefronts:
- Daily/near-daily dry soil removal: microfiber dust mop; shake out or replace pads frequently.
- Routine damp cleaning: pH-neutral stone cleaner with clean water rinses; avoid over-wetting grout lines.
- Immediate spill response: blot (don’t wipe) to reduce etch spread; rinse with clean water and dry.
- Grit prevention: exterior and interior walk-off mats; felt under chair legs; avoid dragging heavy items.
- Periodic professional refresh: light re-polish or fine honing before traffic wear becomes deep scratch haze.
Choosing a Poway Marble Polishing Provider: Scope Items to Confirm Before Scheduling
A dependable scope is defined by process steps, not marketing terms like “deep shine.” You should be able to confirm the abrasive plan, edge work method, protection steps, and how the technician will verify results under realistic lighting.
Before approving work, confirm these job-critical details in writing:
- Defined finish target: honed, satin, or polished—matched across rooms and transitions.
- Grit sequence and method: minimum starting grit and final refinement step; no skipped stages.
- Edge and corner approach: separate tooling for tight areas; no “one-pass with a buffer.”
- Slurry containment plan: wet vacuum extraction and controlled rinse so adjacent surfaces stay clean.
- Protection and access: moving/protecting furniture, masking baseboards if needed, and managing foot traffic during cure/dry time.
Poway Marble Floors, Restored the Right Way
High-clarity marble restoration is the result of disciplined inspection, correct diamond grit selection, strict slurry control, and detailed edge finishing—not coatings that temporarily mask damage. When the floor is flattened where needed, honed through a complete grit sequence, and polished with clean rinse practices, the surface reads as uniform under angled light, across grout lines, thresholds, and inlays.
For Poway homes and businesses dealing with etching from common acids and abrasion from fine tracked-in grit, the most reliable outcome is a restoration plan that removes damage mechanically and then locks in a maintenance routine that prevents re-scratching. Done correctly, the floor stays reflective, visually even, and easier to maintain without exposing the stone to harsh chemicals or quick-fix shine products.
Frequently Asked Questions
Stop Living With Dull, Etched Marble—Get a True Professional Polish in Poway
Marble doesn’t “wear evenly.” It gets etched by everyday acids, micro-scratched by tracked-in Poway dust and decomposed granite fines, and then it starts reflecting light in patches—clear in one spot, cloudy in the next. That’s why quick fixes (polish-in-a-bottle, waxes, “shine sprays,” or a rental buffer) almost always make things worse: they hide damage temporarily, leave a film that attracts grit, and create uneven gloss that’s painfully obvious in sunlight.
The real risk of DIY (or hiring a low-end “buff and go” service) isn’t just a disappointing finish—it’s permanent, expensive damage. Start with the wrong grit and you can dish-out softer areas, expose lippage, or create swirl marks that take more grinding to remove. Use the wrong cleaner and you’ll etch the surface again before it even dries. Miss slurry control and you can re-scratch the floor while “polishing” it. And if edges, thresholds, and wet-adjacent areas aren’t handled correctly, you’ll end up with dull perimeter bands, haloing, and traction concerns right where people walk most.
If you want your marble to look crisp, level, and uniform across grout lines, inlays, and open-plan transitions, you need a process—not a product. That means proper inspection under angled light, a complete diamond grit progression, controlled water/slurry management, and detailed edge finishing so the entire floor reads as one consistent surface.